フラグメント(Fragment:断片)についてフラグメントって何だ?でHello
world.的な例で説明しましたが、実際利用するにはどうするのか?わからないと思います。書いた本人もわかってもらえるとは思っていません。そこで今回はフラグメント間でやり取りをするプログラムを用意しました。
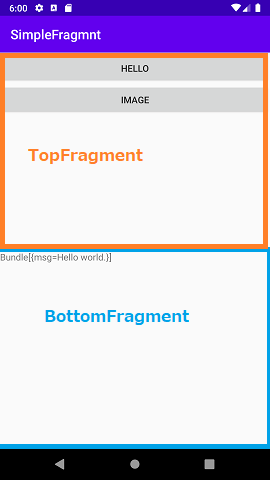
[HELLO]ボタンをクリックすると画面下半分にBottomFragmentによりHello wrldが表示されます。
実際にはBundleをそのまま表示しているので、このような表示になっています。
次に[IMAGE]ボタンをクリックします。
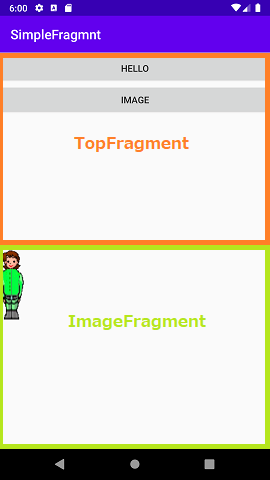
Hello word.が消えてイメージが表示されます。
画面下半分はTopFragmentのボタンを操作でフラグメントが切り替えられます。
設計のやり方:
①Empty
Activityでプロジェクトを作成します。(SimpleFragmentにしました)
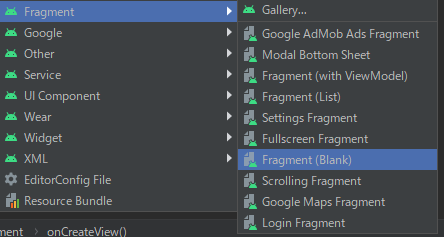
②TopFragment,
BottomFragment, ImageFragmentの作成します。
[File]-[New]-[Fragment]-[Fragment(Blank)]
Fragmentの名前を決めます。
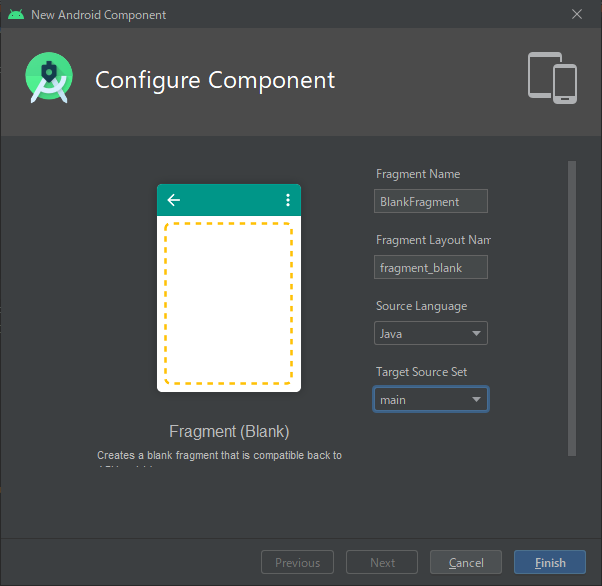
この手順でTopFragment,BottomFragment,ImageFragmentを作成します。例えば、TopFragmentを作成すると自動的にfragment_top.xmlも作成されます。
③activity_mainを書き直す
Hello world.のTextViewは不要なので削除します。
FragmentとFrameLayoutで構成します。
<?xml version="1.0" encoding="utf-8"?>

<LinearLayout xmlns:android="http://schemas.android.com/apk/res/android"
android:layout_width="match_parent"
android:layout_height="match_parent"
android:orientation="vertical">

<fragment
android:id="@+id/topfragment"
android:name="net.sadaji.simplefragmnt.TopFragment"
android:layout_width="match_parent"
android:layout_height="match_parent"
android:layout_weight="0.5" />

<FrameLayout
android:id="@+id/bottomFrame"
android:layout_width="match_parent"
android:layout_height="match_parent"
android:layout_weight="0.5">

</FrameLayout>
</LinearLayout>
これだけではよくわからないと思います。

画面を2分割してTopFragmentとFrameLayoutで使います。プログラムの起動後はFrameLayoutは空っぽです。TopFragmentのボタンが押下されると、FrameLayoutをBottomFragmentまたはImageFragmentで置き換えます。
TopFragment.java
    @Override
    public View onCreateView(LayoutInflater inflater, ViewGroup container,
                             Bundle savedInstanceState) {
        // Inflate the layout for this fragment
        View view = inflater.inflate(R.layout.fragment_top, container, false);

        Button btn =  view.findViewById(R.id.button);
        btn.setOnClickListener(new View.OnClickListener(){
            @Override
            public void onClick(View v) {
                FragmentManager manager = Objects.requireNonNull(getFragmentManager());
                BottomFragment fragment = new BottomFragment();
                Bundle bundle = new Bundle();
                bundle.putString("msg", "Hello world.");
                fragment.setArguments(bundle);
                manager.beginTransaction()
                        .replace(R.id.bottomFrame, fragment)
                        .commit();
            }
        });

        Button btnImag =  view.findViewById(R.id.button2);
        btnImag.setOnClickListener(new View.OnClickListener(){
            @Override
            public void onClick(View v) {
                FragmentManager manager = Objects.requireNonNull(getFragmentManager());
                ImageFragment fragment = new ImageFragment();
                manager.beginTransaction()
                        .replace(R.id.bottomFrame, fragment)
                        .commit();
            }
        });

        return view;
    }
    	BottomViewにHello world.をセットする。
fragment.setArguments(bundle);


		FrameLayoutをBottomViewで置き換える。
                 manager.beginTransaction()
                        .replace(R.id.bottomFrame, fragment)
                        .commit();
この仕組みでottomViewにデータを渡して、表示をします。
BottomFragmentがデータを受け取り表示するのは、
   @Override
    public View onCreateView(LayoutInflater inflater, ViewGroup container,
                             Bundle savedInstanceState) {
        // Inflate the layout for this fragment
        View view = inflater.inflate(R.layout.fragment_bottom, container, false);
        TextView tv = view.findViewById(R.id.bottomText);
        Bundle bundle;
        Activity activity = Objects.requireNonNull(getActivity());
        bundle = Objects.requireNonNull(getArguments());
        tv.setText(bundle.toString());

        return view;
    }
bundle = Objects.requireNonNull(getArguments());
で―多を受け取ります。
ImageFragmentも同様の仕組みです。
フラグメントを使えば1つの画面内に様々のViewを切り替えて使うことができます。
ソースのダウンロード:
SimpleFragmnt.zip
|
